Cookies help us deliver our services. By using our services, you agree to our use of cookies. Learn more
Mastering Lock Installation: A Step-by-Step Guide
Posted in
Resources
|
By
August 23, 2023
Conner Mulrooney

Are you looking to enhance the security of your property by installing a new lock? Or perhaps you're a contractor seeking guidance on efficiently installing locks for your clients. Whether you're a DIY enthusiast or a professional, mastering lock installation is essential for safeguarding your premises. In this comprehensive guide, we'll walk you through the step-by-step process of installing locks like a pro.
1. Understanding Lock Templates: Before diving into the installation process, it's essential to understand the concept of lock templates. Lock templates are pre-made guides or patterns that outline the precise measurements and hole placements required for installing specific types of locks. These templates serve as invaluable tools for ensuring accuracy and consistency during installation, especially for beginners or those working with unfamiliar lock models.
2. Gather Necessary Tools and Materials: To begin the installation process, gather all the necessary tools and materials. This may include a drill with appropriate drill bits, a screwdriver, a measuring tape, a pencil, a level, and of course, the lockset itself. Having everything you need on hand will streamline the installation process and minimize disruptions.
3. Prepare the Door: Before installing the lock, prepare the door by marking the locations for the lockset and any additional hardware, such as deadbolts or latch plates. Use the lock template to accurately mark the positions for drilling holes and cutting mortises. Double-check your measurements and markings to ensure proper alignment and fit.
4. Drill Holes and Cut Mortises: Using the appropriate drill bits and cutting tools, carefully drill holes and cut mortises according to the markings on the door. Take your time and work methodically to avoid errors or damage to the door surface. Refer to the lock template as needed to ensure precise hole placements and dimensions.
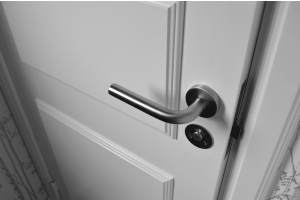
5. Install the Lockset: With the holes drilled and mortises cut, it's time to install the lockset. Begin by inserting the latch or bolt mechanism into the prepared mortise, followed by the exterior and interior components of the lock. Secure the lockset in place using the provided screws, ensuring a snug and secure fit.
6. Test and Adjust: Once the lockset is installed, test its operation to ensure smooth and reliable functionality. Check that the latch or bolt extends and retracts smoothly, and that the lock cylinder operates correctly with the key. Make any necessary adjustments to the hardware or door alignment to achieve optimal performance.
Conclusion: By following this step-by-step guide, you can master lock installation with confidence and precision. Whether you're a homeowner looking to upgrade your security or a contractor seeking to deliver quality installations for your clients, understanding lock templates and following proper installation procedures is key. For a wide selection of high-quality locks and expert guidance, visit DoorsForPros.com and take the first step towards enhancing your property's security today.
Share post:

Recent Posts