Cookies help us deliver our services. By using our services, you agree to our use of cookies. Learn more
The Ultimate Guide to Commercial Locks: Types, Features, and Installation Tips
Posted in
Resources
|
By
March 11, 2024
Conner Mulrooney
Introduction: When it comes to securing commercial spaces, choosing the right locks is paramount. Commercial locks not only provide access control but also play a crucial role in enhancing security and protecting assets. In this comprehensive guide, we'll delve into everything you need to know about commercial locks, including the various types, key features, and essential installation tips.
Types of Commercial Locks:
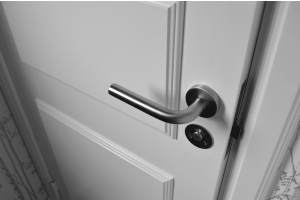
Mortise Locks: Known for their durability and strength, mortise locks are commonly used in commercial settings. They offer a high level of security and are suitable for heavy-duty applications.
Cylinder Locks: These versatile locks are found in a wide range of commercial doors. Cylinder locks come in different configurations, including single cylinder, double cylinder, and thumbturn.
Deadbolt Locks: Ideal for external doors, deadbolt locks provide robust security by extending a solid metal bolt into the door frame. They offer resistance to forced entry and are available in various designs, including single, double, and jimmy-proof deadbolts.
Keyless Entry Systems: Embracing modern technology, keyless entry systems offer convenience and enhanced security. They utilize methods such as keypad codes, key cards, or biometric access for entry, eliminating the need for traditional keys.
High-Security Locks: Designed to withstand sophisticated intrusion attempts, high-security locks feature advanced mechanisms and key systems. They provide superior resistance to picking, drilling, and other tampering techniques.
Key Features to Consider:
Durability: Commercial locks should be built to withstand heavy use and external elements, ensuring long-lasting performance.
Key Control: Maintain control over who has access to your premises with key control features, such as restricted keyways and key tracking systems.
ADA Compliance: Ensure that your locks meet the accessibility standards outlined by the Americans with Disabilities Act (ADA) to accommodate individuals with disabilities.
Security Ratings: Look for locks that meet industry standards for security ratings, such as ANSI/BHMA grades, to ensure reliable protection against unauthorized entry.
Installation Tips:
Proper Alignment: Ensure that the lock mechanism aligns correctly with the strike plate and door frame to prevent binding or sticking.
Reinforced Door Frame: Install commercial locks on reinforced door frames to enhance security and prevent forced entry.
Professional Installation: For optimal performance and security, consider hiring a professional locksmith to install your commercial locks, especially for complex systems or high-security applications.
Conclusion: Selecting the right commercial locks is essential for safeguarding your business premises, assets, and personnel. By understanding the various types, key features, and installation considerations, you can make informed decisions and invest in the best security solutions for your commercial space. Whether you opt for traditional cylinder locks or advanced keyless entry systems, prioritize reliability, durability, and compliance to ensure robust protection against unauthorized access.
Share post:


Recent Posts